
A polished concrete floor is aesthetically appealing and gives your home a brand new look. Concrete floors have higher reflectivity and so appear brighter and are also slip-resistant. You can easily polish your floor with the help of a few tools and products. If your concrete floor is beginning to look dull, you should consider polishing it for a better look.
Tools for Polishing Concrete floors
You will need the following tools to polish your concrete floor.
- MOHS (Measurement of Hardness Scale) tester kit
- Protective gear, that is, face masks, goggles, gloves, and coveralls.
- Concrete grinding tooling (30/40, 60/80, 120 grit)
- Concrete polishing pads (200, 400, 800, 1500, 3000 grit)
- Roller or sprayer
Products For Polishing A Concrete Floor
- Soap and water
- Crack filler
- Densifier
- Concrete sealer
Here are the steps on how to polish concrete floors
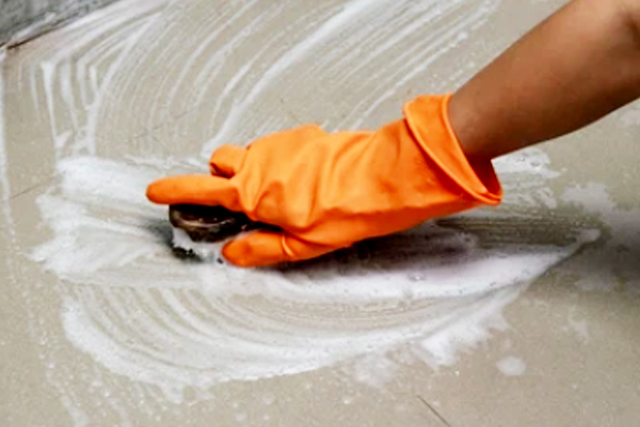
Cleaning and inspection
The first thing you should do when polishing your floor is cleaning it. Take your time to wash the floor with soap and water, taking care to remove all dirt from the floor. If there are pieces of tape, paper, PVC stuck to it, ensure that you remove them all. In case there are stubborn stains, you should try hydrogen peroxide, TSP, or Ammonia to remove them.
Make sure that you do not mix these products. It is not advisable to clean the floor on your hands and knees, especially when using chemical stain removers, use a push brush with a handle instead. Remember to rinse off any excess soap and chemicals.
After the area is dry, you need to inspect it for fissures. Remember, cracks on your floor are bound to spread if left unrepaired. Make a minute inspection of the area and note where holes are. If there are other issues, such as protruding pieces of metal, make a note of them too. Cut out protruding bits of metal and repair the concrete. If you do not know how to do this, speak to a professional.
You can repair cracks on the floor using a crack filler if they are 0.25 inches wide. Make sure that the concrete filler you buy can be applied using a caulk gun. If the fissures are wider, you can buy a vinyl concrete patch. Make sure that you sweep out any debris in the cracks before you patch them. Allow the product you use to cure before you can proceed to the next step.
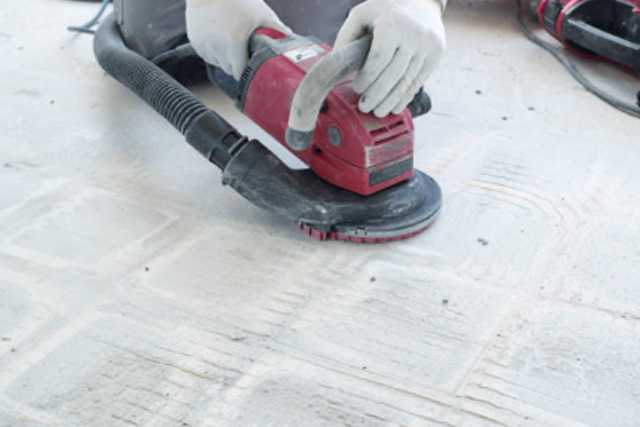
Concrete Grinding
You will need to test the floor hardness before using a concrete diamond grinder on it. You can do that using a MOHS testing kit. MOHS stands for Measurement of Hardness Scale. Choose an area of the floor, and starting with the #9 pick, draw a line on the floor. Ensure that you use the same pressure you would if you were drawing with a pencil.
Do this with the #8, #7,#6 picks, and so on until you find the pick that does not scrape the floor. If the #8 scratches the concrete while the #7 does not, you can estimate that it has a MOHS hardness of 7.5. You can purchase MOHS picks at your local hardware store or online.
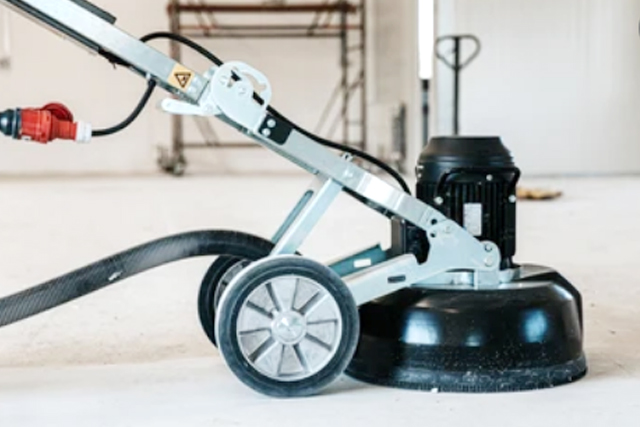
It is essential to check concrete hardness because it determines the type of diamond tooling you get with your grinder. There are tooling for a soft (5.5 and below), medium (6.5), and hard floor (7.5 and above). If you are planning to undertake a DIY project, you can opt to rent a walk-behind floor grinder for larger projects or an angle grinder for smaller projects. You can rent concrete diamond grinding equipment at your local tool rental establishment or hardware store like The Home Depot.
Make sure that you pick a diamond abrasive that works for the type of floor that you have. The one you choose should be a metal-bonded diamond abrasive, as anything else will not grind concrete properly. You might need a few to achieve the desired look of the floor surface.
While at the store, check that the desired grinder is comfortable in your hands. You can also ask a store attendant on how to properly use it for the project in question. Bear in mind that a large grinder rental may be on the pricier side whereas a small angle grinder may be more budget-friendly.
Put on your protective gear as grinding concrete produces large amounts of dust. It is also essential that you get non-slip footwear to avoid accidents during work. Start with 30/40 grit diamond abrasive and grind the floor in half-circles while slowly moving forward. Do this for the entire floor and repeat until the desired exposure is achieved. Keep in mind that the lower the grit value, the coarser the tooling, and the higher the grit value, the finer the tooling (i.e., 30/40, 60/80, 120 grit). Ultimately, each abrasive buffs out the scratches created by the previous one. It may be necessary to use them all for a smooth floor.
After completing the initial grinding process, transitional diamond pads come into play. These pads are used between the grinding and polishing stage to remove any existing scratches. Here, use a 30 or 50 grit transitional diamond pad. Thereafter, use a wet-dry vacuum to suck up all dust and debris. Even if your grinder has an integrated vacuum, ensure that you use a wet-dry vac after grinding.
Proceed with using a 200-grit polishing pad on the grinder or burnishing machine. After the floor reaches the desired look, apply the densifier to the floor. A densifier is a liquid concrete hardener that you can purchase at your local hardware store or online. Spray the densifier all over the floor and let it dry before you continue, but do not let it pool as it may cause staining, which may pose a problem during the polishing stages.
Polish and Seal
When the floor eventually dries, continue with using a 400-grit concrete polishing pad. Pass it over the entire floor to give it a smooth appearance. After you do that, apply a coat of concrete sealer using a sprayer or a roller. Sealers protect a concrete floor against stains such as grease. Make sure that you apply sealer during dry conditions with temperatures between 50 to 90 degrees (check manufacturer’s recommendation). A second coat should be applied 2-4 hours after the first. When the second coat is dry to the touch, burnish the floor again using 800 and 1500-grit or 3000-grit pads to enhance the glossy finish. Wait for 24-72 hours before using your new floor.
The above process will ensure that your concrete floor looks glossy and smooth.